Configure Payment Gateways
Overview
Home >> Settings >> Billing >> Payment Gateways
In the Payment Gateways section, you can configure the payment methods (gateways) for receiving payment from your customers.
To access the Payment Gateways section:
- Go to Settings.
- Click on Payment Gateways in the Billing section.
In the Payment Gateways section, you can view the list of payment gateways that you have activated.
See sample screenshot of the Payment Gateway section:
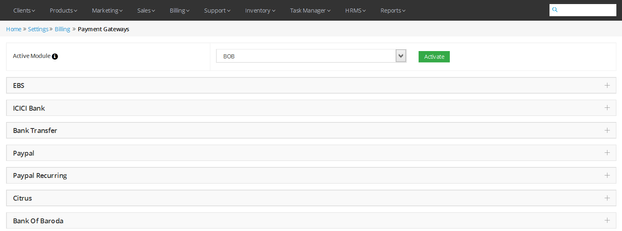
Activate a Payment Gateway
To activate a Payment Gateway:
- Select a Payment Gateway to Activate from the Active Module dropdown list.
- Click on the Activate button.
Configure a Payment Gateway
To configure a payment gateway:
- Click on the Payment Gateway's name from the list of active payment gateways.
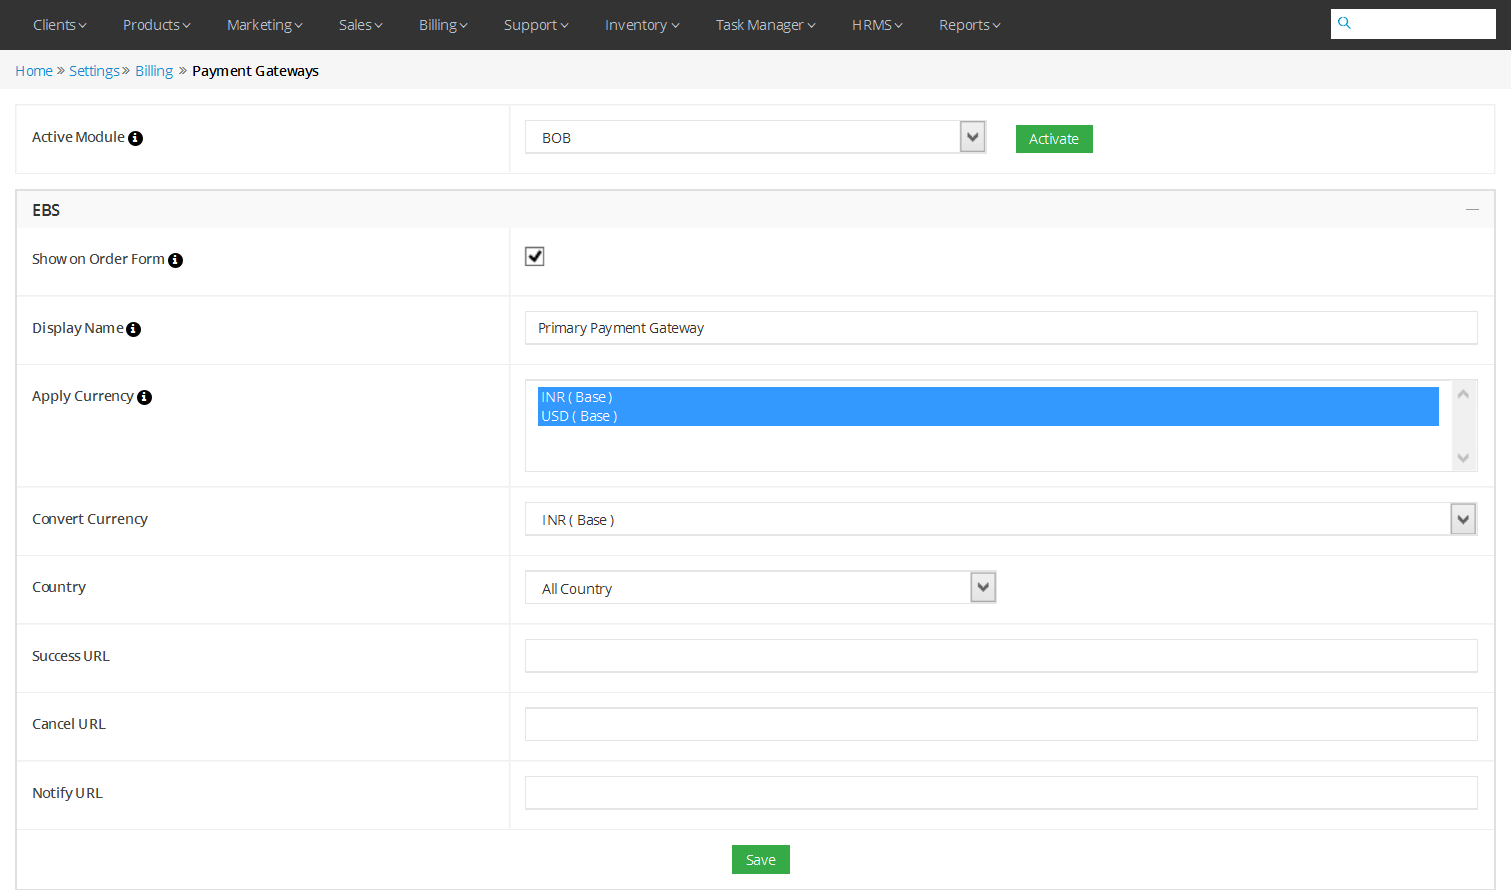
- The payment gateway configuration details will open in the dropdown window as shown in the screenshot below.
- Tick Show on order form to enable the gateway be shown on the order form.
- Select a Display Name, Currencies and Countries for the payment gateway.
- Click on the Save button to save the configuration for the payment gateway.
See sample screenshot of the Payment Gateway Configuration window:
Note for Main Company's Partners
The main company's partners can configure and activate payment gateways for receiving payments of their customers through this section.
Sorting Payment Gateways
Home >> Settings >> Billing >> Payment Gateways
This feature will allow admin to organize the elements (Payment Gateways) in a certain order.
Payment Gateways should be visible in same sequence in both Member panel and Marketplace as in service provider and Partner Admin Panel.
The admin can sort the payment gateways through this section:
- Select a payment gateway whose order you want to change. Simply drop it at the position.
By default, Payment Gateways will be sorted on basis of Active and Inactive. Activated Payment Gateway will be visible first and Inactive Payment Gateway will be shown below them.
The sorting will affect the following areas:
- Member Panel: Payment gateway options will be visible in the order as sorted in Admin panel every time a user proceeds for payment.
- Service Provider/ Partner Marketplace: Customer can see the changed sequence while placing an order in service provider and partner marketplace respectively.
Configuring PayPal payment gateway
This section lets you configure PayPal payment gateway into the cloud automation platform.
To access the Payment Gateways section:
- Go to Settings.
- Click on Payment Gateways in the Billing section. From the Activate Payment Gateway drop-down select PayPal and click on Activate button. Once activated, the payment gateway will be
highlighted green.
- To configure the newly activated payment gateway's setting click on PayPal payment gateway.
- Tick the Show on Order Form checkbox 'yes' if you want to make the payment gateway visible on any order form.
- Enter the Display Name. The name entered here will be displayed during the order process.
- Enter the PayPal Email ID. Enter the email of your PayPal account that you want to configure.
- Apply Currency: Set currency for the payment gateway which will be displayed to the client while making payment.
- API Username: Enter API username that you get from Paypal.
- API Password: Enter API password that you get from Paypal.
- API Signature: Enter API signature that you get from Paypal.
- Enter the Convert currency, it is the currency in which the merchant accepts the payment.
- Select Country: All Country (applicable to all), select Applicable country by choosing from the list or select Non-applicable country from the list.
- The Success URL, Cancel URL and Notify URL will be auto-filled. The admin needs to add the logo URL.
- Click on Save.
- Success URL: To set the return URL for a successful payment transaction.
- Cancel URL: To set the return URL for any issues while payment transaction.
- Logo URL: Set a logo on paypal payment gateway form.
- Notify URL: PayPal returns data back to your site via what they call IPN. Its really just a callback to a URL you specify. You can set this URL via the variable notify URL you can send to PayPal.
- Select the Test mode check box when doing dummy payment, unselect it for live payment mode.
Configuring RazorPay payment gateway
This section lets you configure RazorPay payment gateway into the cloud automation platform.
- Go to Settings.
- Click on Payment Gateways in the Billing section.
- Click on RazorPay.
- Enter the Display Name. The name entered here will be displayed during the order process.
- Set currency for the payment gateway which will be displayed to the client while making payment.
- Enter App ID and App Secret.
- Enter the Convert currency, it is the currency in which the merchant accepts the payment.
- Select Country - All Country (applicable to all), select Applicable country by choosing from the list or select Non-applicable country from the list.
- The Success URL, Cancel URL and Notify URL will be auto-filled. The admin needs to add the Logo URL.
- Click on Save.
Configuring Network International payment gateway
This section lets you configure Network International payment gateway into the cloud automation platform.
- Go to Settings.
- Click on Payment Gateways in the Billing section.
- Click on Network International.
- Enter the Display Name. The name entered here will be displayed during the order process.
- Set currency for the payment gateway which will be displayed to the client while making payment.
- Enter Merchant Key and Merchant ID.
- Enter the Convert currency, it is the currency in which the merchant accepts the payment (AED).
- Select Country - All Country (applicable to all), select Applicable country by choosing from the list or select Non-applicable country from the list.
- The Success URL, Cancel URL and Notify URL will be filled by the Admin.
- Click on Save.
- Success URL: To set the return URL for a successful payment transaction.
- Cancel URL: To set the return URL for any issues while payment transaction.
- Notify URL: It's is just a callback to a URL you specify.
- Test mode or live mode of Network International payment gateway is set by the Merchant Key and Merchant ID provided.
Configure Paystack payment gateway
- Go to Settings.
- Click on Payment Gateways in the Billing section. From the Activate Payment Gateway drop-down select Paystack and click on Activate button. Once activated, the payment gateway will be highlighted green.
- To configure the newly activated payment gateway's setting click on Paystack payment gateway.
- Tick the Show on Order Form checkbox yes, if you want make the payment gateway visible on any order form.
- Enter the Display Name. The name entered here will be displayed during the order process.
- Set currency for the payment gateway which will be displayed to the client while making payment.
- Enter App ID and App Secret. Enter the App ID that you will get from Paystack. For generating App ID from Paystack follow the steps given below:
- Create an account on Paystack dashboard.
- Add your business details and update your profile.
- After activating your business, move to Settings >> API Keys & Webhooks. Here you can find your Secret Key and public key.
- Update App ID with public key from Paystack dashboard.
- Update App secret with secret key from Paystack dashboard.
- Enter the Convert currency, it is the currency in which the merchant accepts the payment. By default Paystack accepts Nigerian currency (NGN).
- Select Country - All Country (applicable to all), select Applicable country by choosing from the list or select Non-applicable country from the list.
- The Success URL and Cancel URL will be auto-filled.
- Click on Save.
- Success URL: This is the URL to which the user will be redirected on payment success.
- Cancel URL: This is the URL to which the user will be redirected when payment is cancelled.
- Logo: Logo which is to be shown at time of processing payment with Paystack. This can be set from Paystack Dashboard directly https://dashboard.paystack.com/#/settings/business. Paystack recommends to use a square logo with dimensions 100px by 100px for best results on the checkout form. Max Size: 512kb.
- After successful setup, the payment gateway will be available to make payment.
- Payment Gateway receipt will be generated and can be seen in admin panel.
- Success URL: To set the return URL for a successful payment transaction.
- Cancel URL: To set the return URL for any issues while payment transaction.
- Notify URL: It’s just a callback to a URL you specify.
- Logo URL: Set a logo on RazoPay payment gateway form.
- Test mode or live mode of RazorPay payment gateways is set by the APP ID and APP Secret provided.
Configure Pay by Offline Mode payment gateway
- Go to Settings.
- Click on Payment Gateways in the Billing section. From the Activate Payment Gateway drop-down, select Pay By Offline Mode and click on Activate button. Once activated, the payment gateway will be visible below.
- To configure the newly activated payment gateway's setting, click on Pay By Offline Mode payment gateway.
- Tick the Show on Order Form checkbox 'yes' if you want to make the payment gateway visible on any order form.
- Enter the Display Name. The name entered here will be displayed during the order process.
- Enter the Payment Instructions. The content provided here will be displayed in the order process as it is.
- Custom Fields: These provide dynamic tags which if placed inside “Payment Instructions” will be replaced by their actual values.
- Currency Prefix: {$currency_prefix} will be replaced by Currency Prefix as setup in Currency master.
- Balance: {$balance} will be replaced by actual amount.
- Client ID: {$client_id} will be replaced by Customer ID.
- Apply Currency: Set currency for the payment gateway which will be displayed to the client while making payment.
- Select Country: All Country (applicable to all), select Applicable country by choosing from the list or select Non-applicable country from the list.
- Click on Save.
- After successful setup, the payment gateway will be available to make payment.
Configuring N-genius payment gateway
- Go to Settings.
- Click on Payment Gateways in the Billing section.
- Click on N-genius.
- Tick on Show on Order Form checkbox.
- To display name on the marketplace while purchasing, enter the Display Name. The name entered here will be displayed during the order process.
- Enter the N-genius Email.
- Set currency for the payment gateway which will be displayed to the client while making payment.
- Enter the API Key and Outlet ID.
- Enter the Convert Currency. It is the currency in which the merchant accepts the payment (AED).
- Select Country - All Country (applicable to all), select Applicable Country by choosing from the list or select Non-applicable country from the list.
- The Success URL, Cancel URL and Notify URL will be filled by the Admin.
- Click on Save.
- Tick on Skip Confirmation Page (Ticking on this checkbox will skip appearance of payment confirmation page before you are redirected back to the site).
- Success URL: To set the return URL for a successful payment transaction.
- Cancel URL: To set the return URL for any issues while payment transactions.
- Notify URL: It's is just a callback to a URL you specify.
- Test mode or live mode of N-genius payment gateway is set by the API Key and Outlet ID provided.